
Have you ever needed to create a video with narrations of your computer screen? In this post I will explain how to do that using the desktop Windows versions of PowerPoint 2013 or 2016. This new feature in PowerPoint is a great tool to get the job done in no time. When completed you will have an MP4 video format that can be shared via email or published online to your audience.
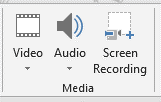
 Before you begin open up the desktop version of PowerPoint 2013 or 2016 and check the Insert tab and verify you have the updated Media group with Video, Audio, and Screen Recording. Also do a test audio configuration of your microphone.
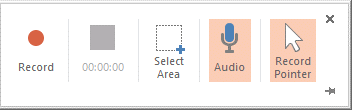
Click Screen Recording and then choose Select Area.
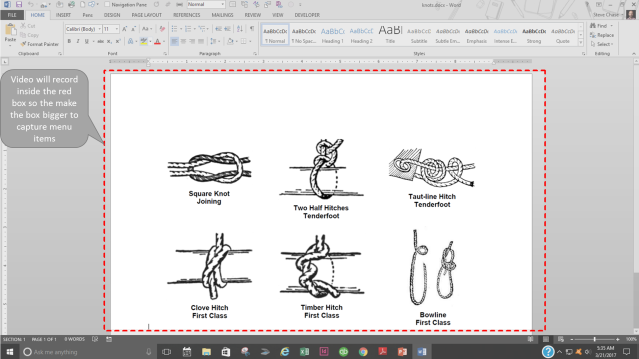
Drag the mouse pointer around the area you want to screen record. It will display a red dashed box around the area that will be recorded. Tip: Make the box as large as the monitor if you want to capture your whole screen or make the box smaller within the focus program to only select a portion of your screen. Once the recording starts any program that overlays inside the red box will get recorded. Anything outside the red box will not be recorded.
Make sure you close any instant messaging program or email notification alerts that may distract your screen recording.
Click Record when ready and you will see a 3-2-1 countdown. To finish either use the shortcut key (Window key +Shift + Q) or click stop. The display bar may be hidden based on the pinned status so move your mouse to the top of the window to reveal the stop button.
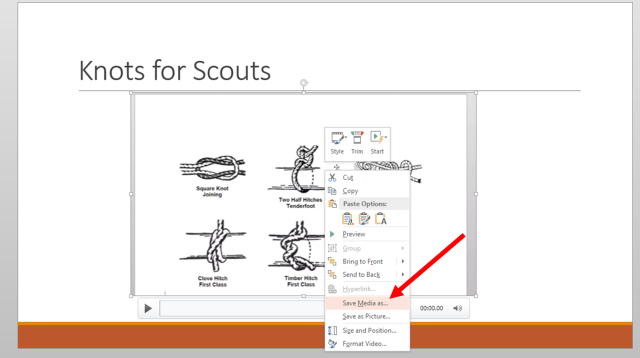
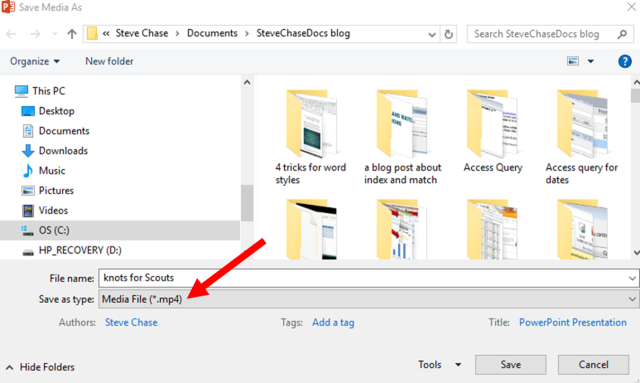
The recording will appear on the PowerPoint slide as a video object as soon as you click stop recording. To export the video, right click and choose “Save Media as”.
The video will save as the mp4 format.
Tip: Before you save your mp4 video, you can first trim out the beginning or end of the video clip from the Video

I hope you found this post helpful. Here is a link to some of my favorite PowerPoint keyboard shortcuts.
